In the beginning, in order to send Google Analytics (GA) hits, you needed to implement the JavaScript codes directly on the webpages, using a JavaScript library:
urchin.jsga.jsanalytics.jsThen, it became a tagging technology supporting multiple Google measurement tags including Google Analytics, Google Ads, and Floodlight. This was done using one of two methods:
gtag.js aka Global Site Tag, implemented directly on the webpagesgtag.js as the underlying technology to dynamically fire tagsAfter that, we saw the beginning of the unification of the two methods when Google tag was announced. Google tag essentially unifies the settings and activation of the linked tags. Though at this point, GTM and Google tag are still different technology and this has caused some confusion when it comes to the proper implementation of Google tags and event/conversion tags in GTM (we will explain this in detail).
Now, Google is doing the next step of unification by merging GTM and Google tag. With this, there could be even more confusion. In this article, we will explain:
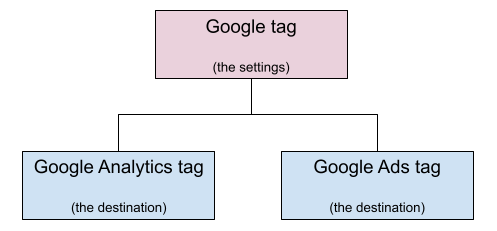
Let's start from here. You can think of Google tag as the shared settings of Google measurement destination(s) such as GA tag, Google Ads tag, and Floodlight tag.
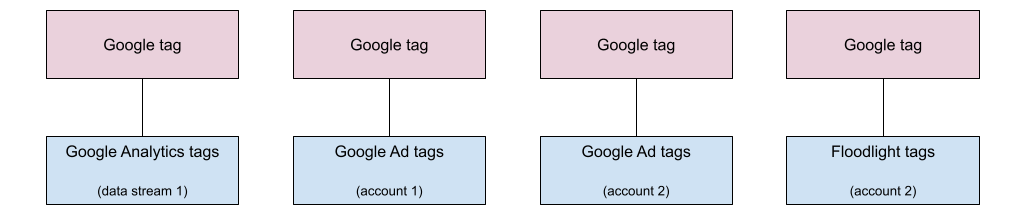
To illustrate using an example, you can have one Google tag that is shared by multiple destinations:
However, tag operation is typically handled by different teams. To avoid confusion or mishandling, we generally recommend one Google tag per operation, like this:
To find the Google tags for your destinations, follow the steps here.
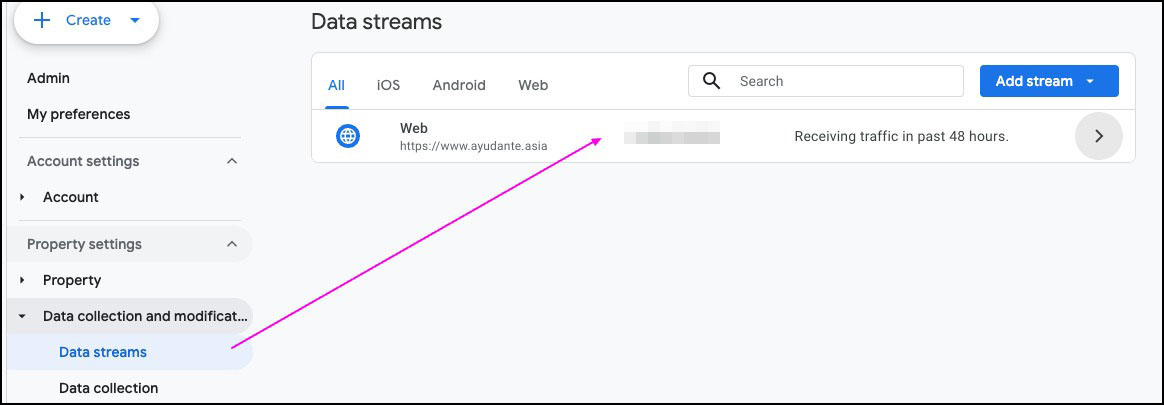
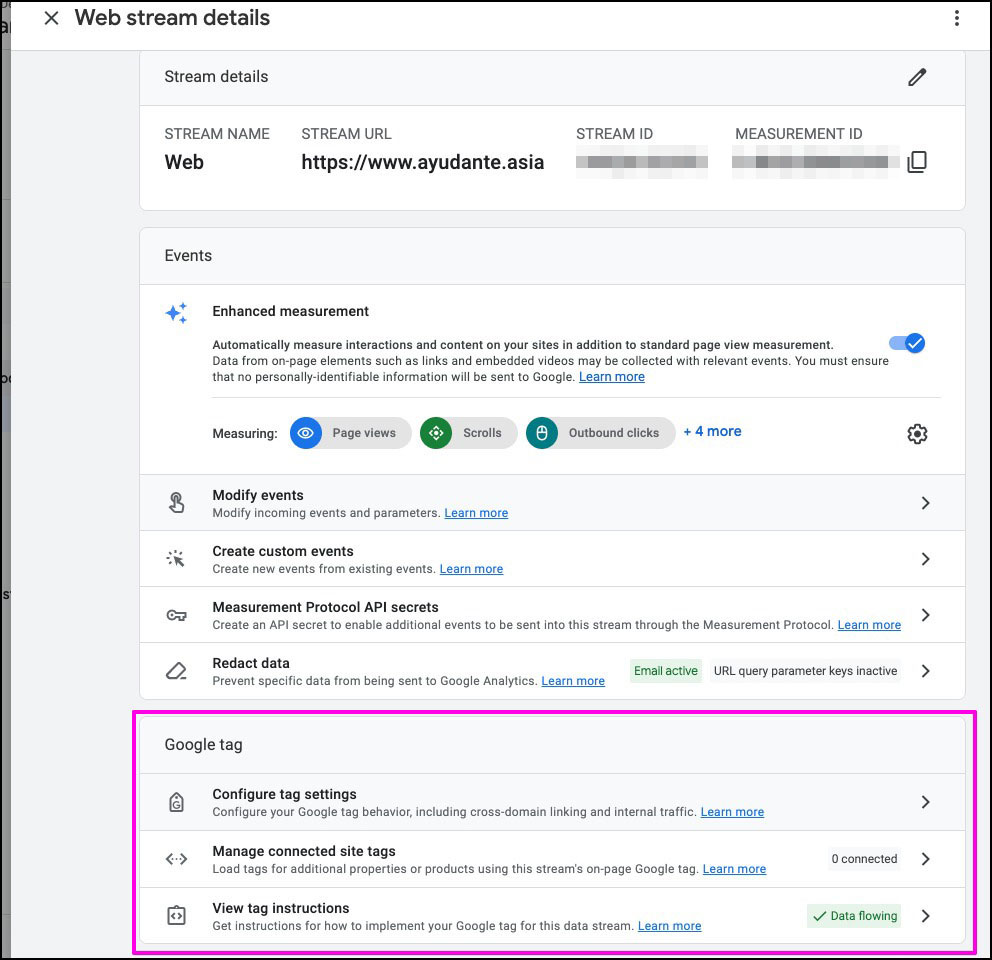
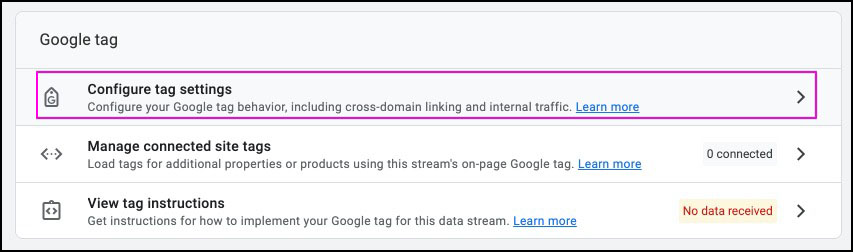
For example, you can find the Google tag for GA, go to Admin → Data collection and modification → Data streams, then click on a data stream:
On the next screen, you will see the Google tag section where you can configure the settings:
We will use this illustration:
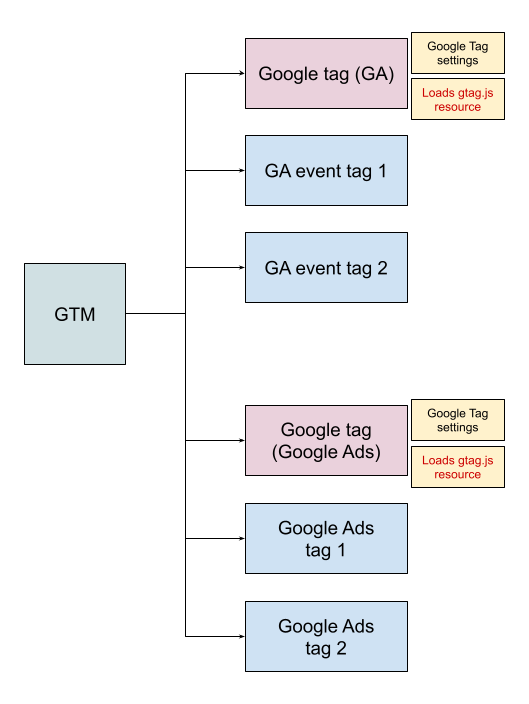
Key takeaways:
With the new update, GTM gains the functionality of Google tag, hence GTM = Google tag.
We will use this illustration:
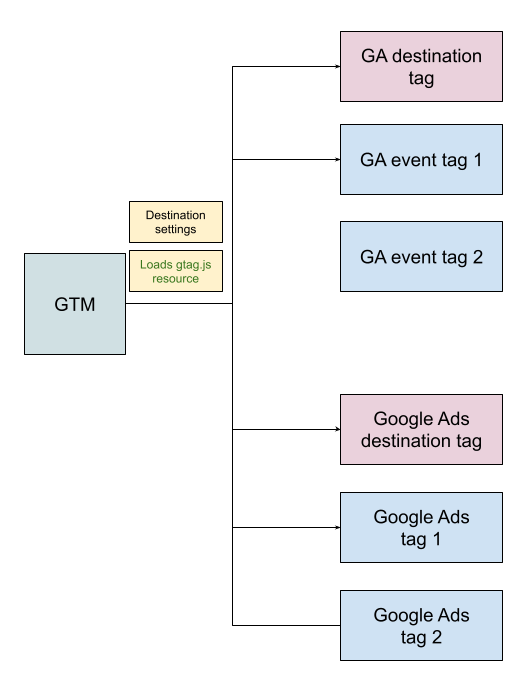
Key takeaways:
In fact, you can visualize the change on the Overview screen of a GTM workspace. On a previous setup, you see something like this where Google tag plays a part in the middle:
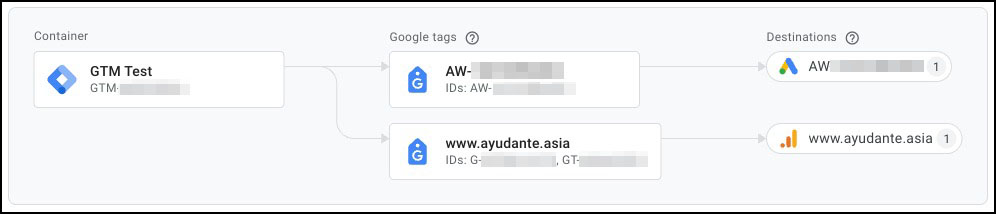
On a new setup, you see something like this, where Google tag is no more, and GTM handles the settings directly:

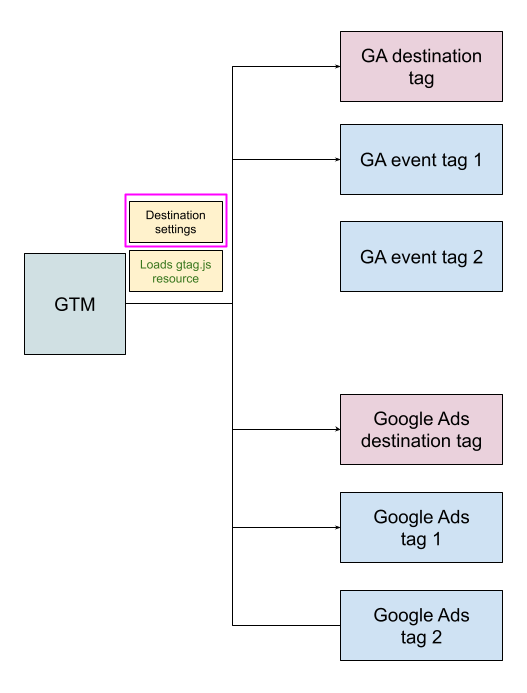
Setting up a Google measurement tag is similar to the Google tag method before, with a few differences in methodology. Refer to the diagram above to help with clarity.
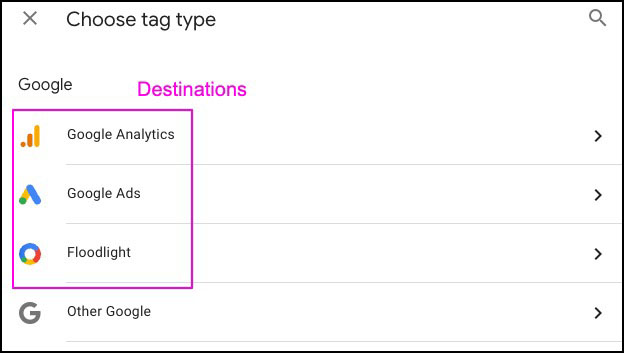
When you add a tag, you will notice the UI update where it shows the three Google measurement destinations listed on top:
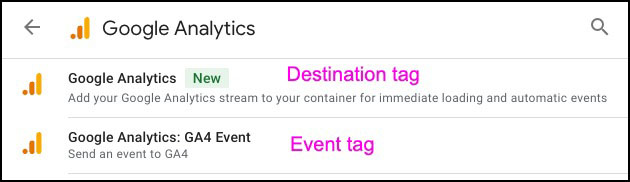
Click on Google Analytics, for example, you will see the tags are separated into (a) Destination tag and (b) Event tag:
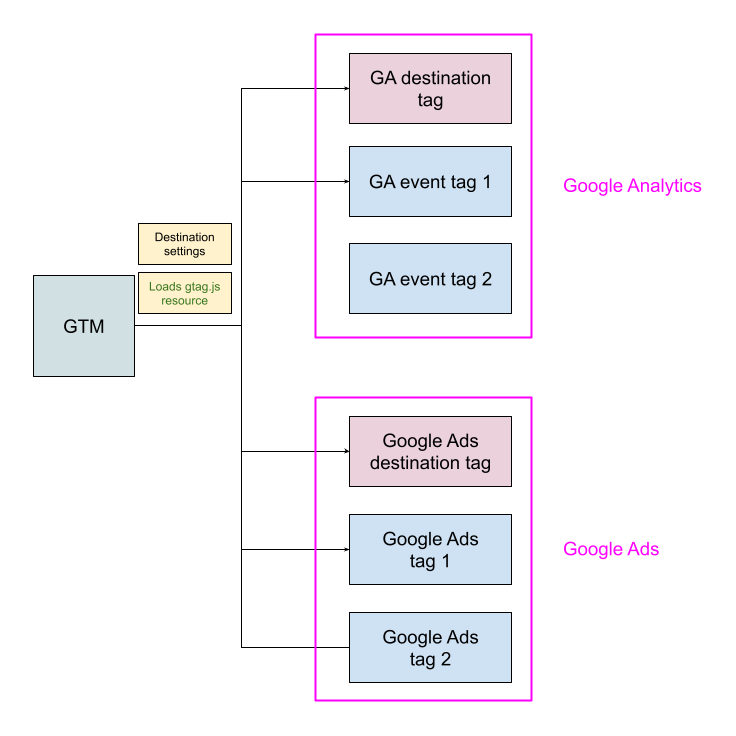
Click on Google Ads or Floodlight, you will see similar separations.
This is illustrated in our diagram:
When you add a destination tag, the step is similar to setting up a Google tag before:
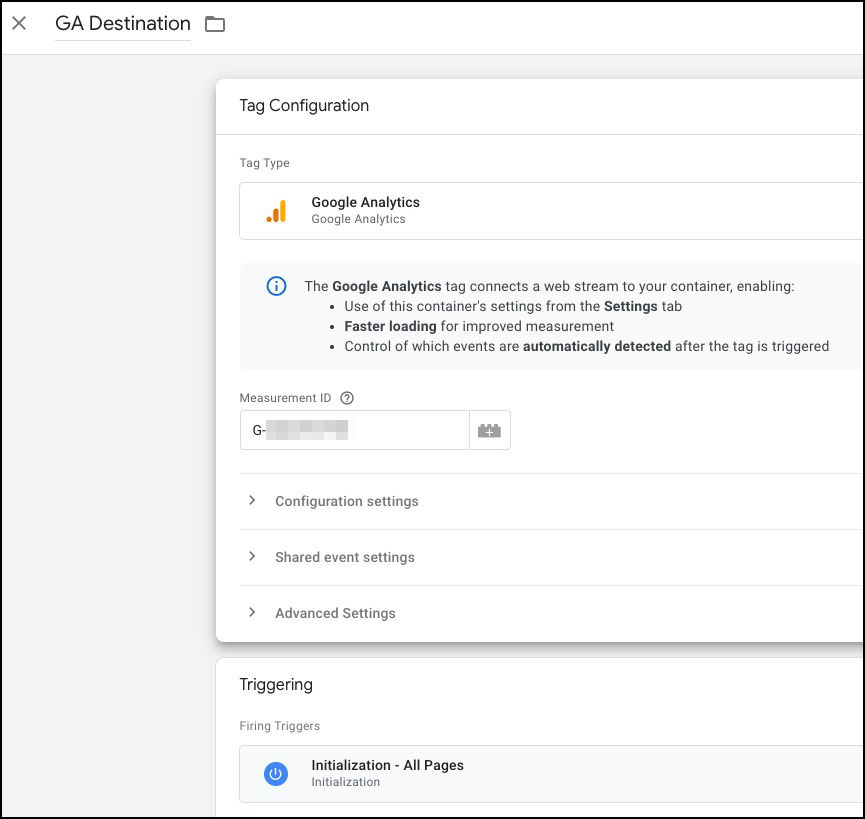
Now let's talk about this part:
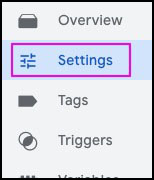
GTM now has a new Settings section:
On this screen you will see all Destination tags that you have set up, and the shared settings that you can configure:
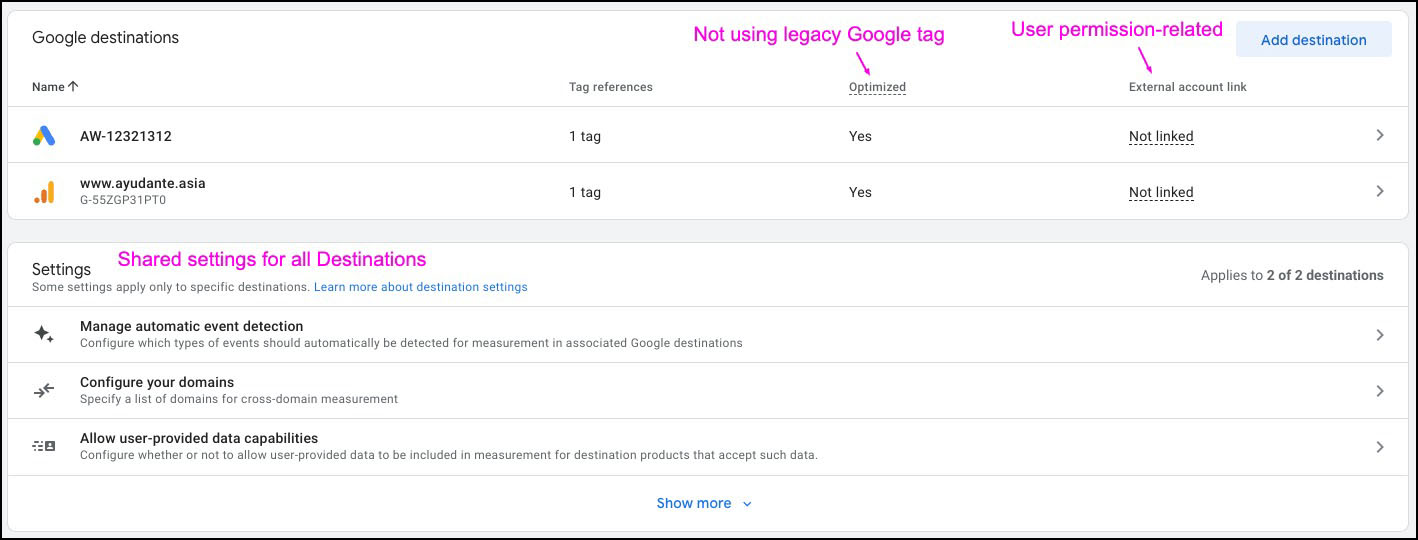
Notes:
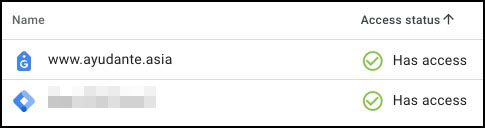
You see a new interface showing connected GTM container and/or destinations:
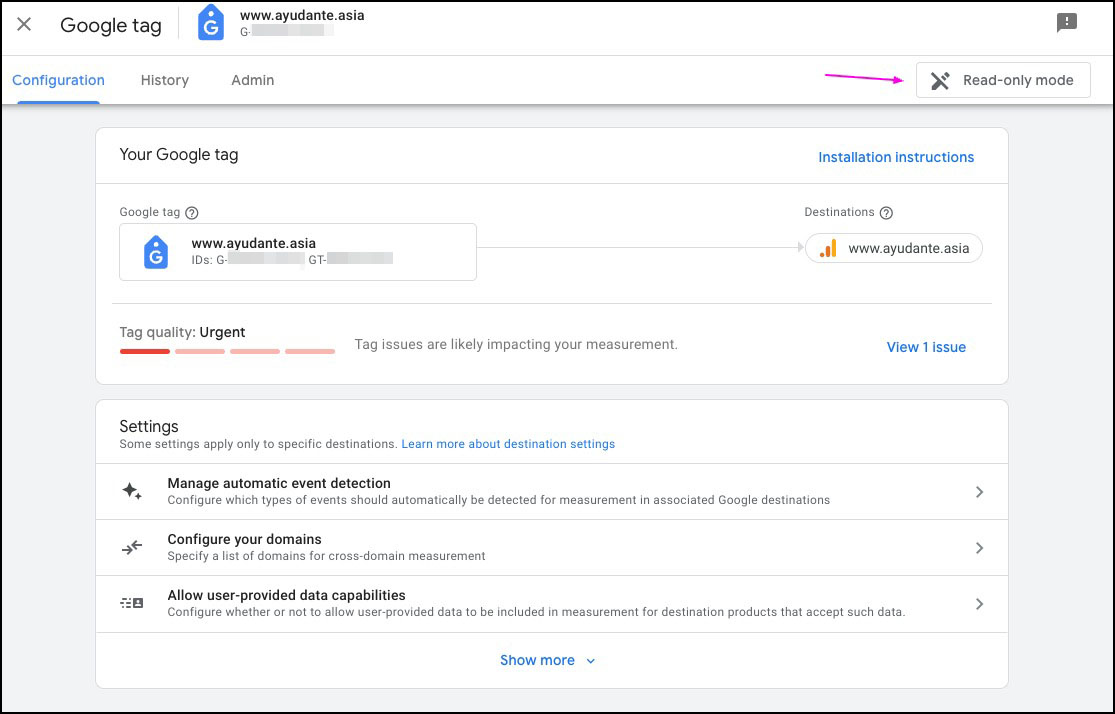
Clicking on a GTM container brings you to the GTM interface. While clicking on a destination shows you the GTM destination settings (read only), for example:
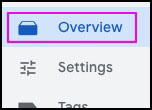
If you have a GTM workspace with a legacy setup, go to the Overview section:
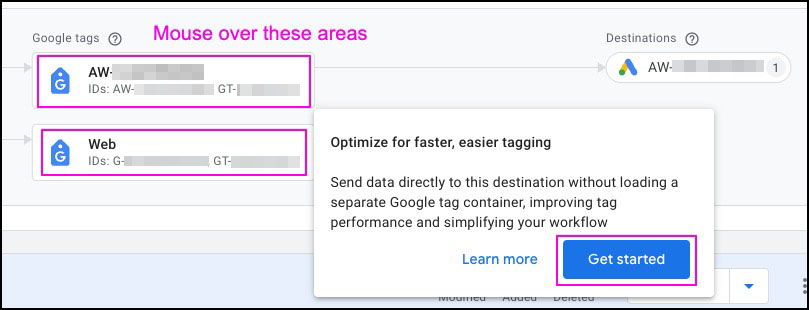
On the Container connection diagram, mouse over any of the legacy Google tag, you should see this popup allow you to start the optimization wizard:
The first step is to select the legacy Google tags that you want to migrate to destination tags:
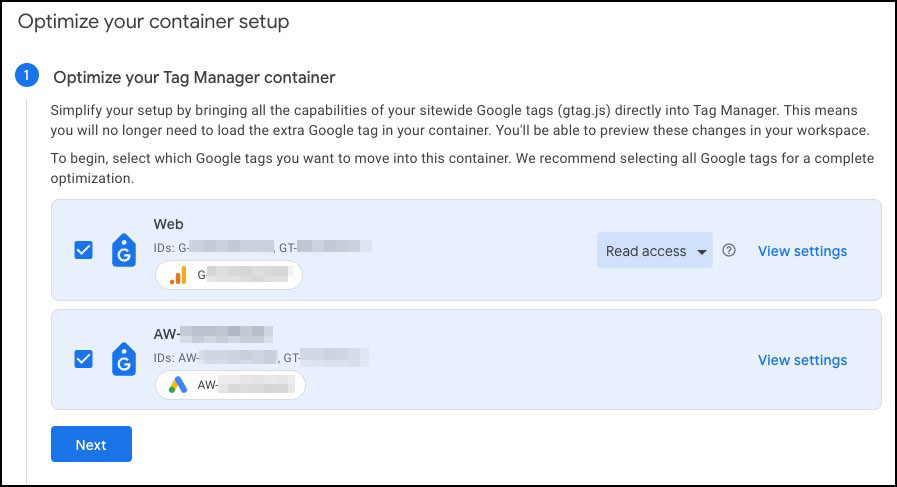
For each, you can also choose to grant GTM read access to users of the destination products. In the screenshot example above, GA users will be able to access this GTM container with read access.
In the next step, if the wizard detects that your multiple Google tags have conflicting settings, it will prompt you to select one to use as the GTM destination settings (the master copy):
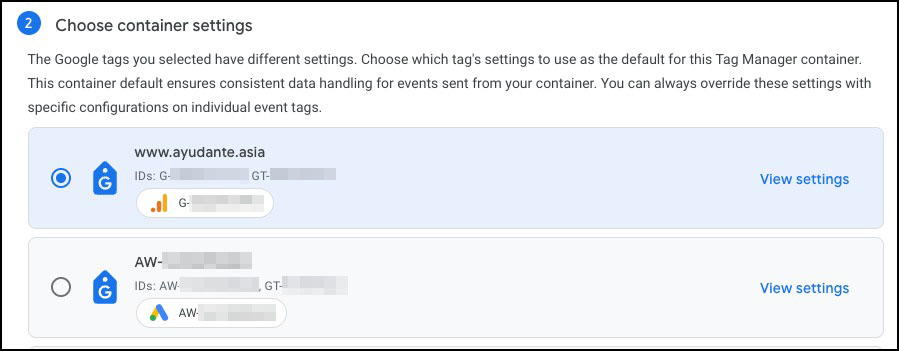
Keep in mind that when this is done, the GTM destination settings will be shared with ALL destinations. So check this step carefully.
The next step is to save the changes to your current GTM workspace:

Once done, on the Overview screen, you will see a much simpler GTM connection diagram:

From here, you can test the new setup by using GTM preview:

If you are happy with the new setup, you may publish the workspace:

To recap:
If you have a complex GTM setup which requires different Google measurement destination settings, your only solution is to use the legacy Google tag tag.
When setting a new tag or migrating legacy tags, GTM already does a good job of auto detecting tag IDs such as:
However, there are limitations. For the migration wizard, currently it's not able to support lookup table variables, which is a common practice to redirect traffic to the correct tag IDs. For example:
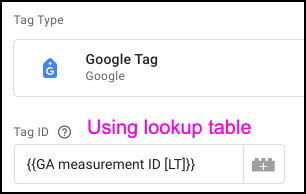
The workaround is to:
Ever since Google announced the "Google tag" technology, there has always been some confusion regarding its usage and its relationship with GTM. With this latest GTM update, we take another step towards:
The last point is especially huge. If you don't have an overly complex GTM setup, you should definitely proceed to migrate to the new method. It will improve the page performance and thus, user experience too.